₹91,499.00 Original price was: ₹91,499.00.₹88,499.00Current price is: ₹88,499.00. inc. Gst
Product Overview
| Brand | BRESSER |
| Model | Messier EXOS‑2 / EQ‑5 |
| Mount Type | German equatorial (non-GoTo) |
| Payload Capacity | 13 kg (visual), 10 kg (astrophotography) |
| Tripod | Stainless steel, adjustable 69–109.5 cm |
| Polar Finder | Illuminated polar scope |
| Mount Weight | 5.6 kg (without counterweight) |
| Tripod Weight | 4.7–4.9 kg |
| Total Weight | ~14.8 kg (with counterweight) |
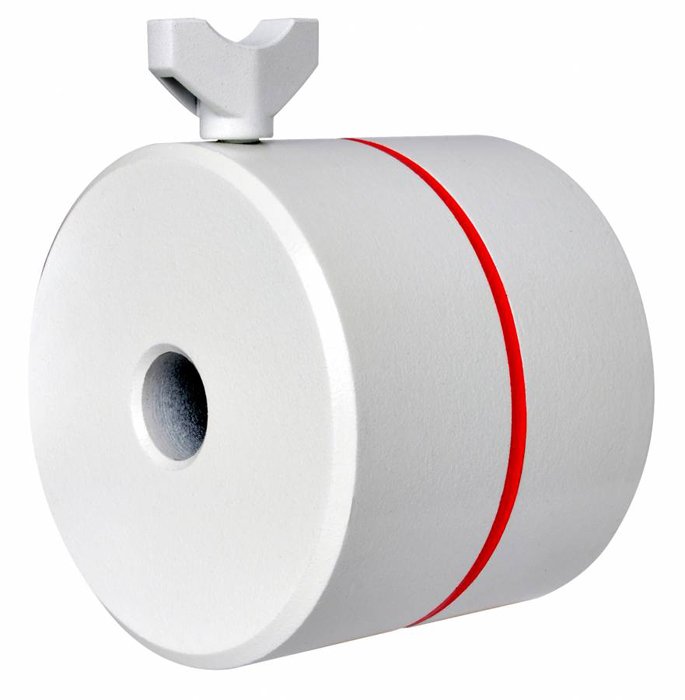
| Counterweight | 4.5 kg |
| Autoguider Port | ST‑4 compatible |
| Ball Bearings | Dual axis for RA/DEC smooth movement |
| Power | 12 V DC input (battery pack optional) |
In stock
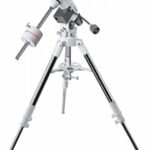
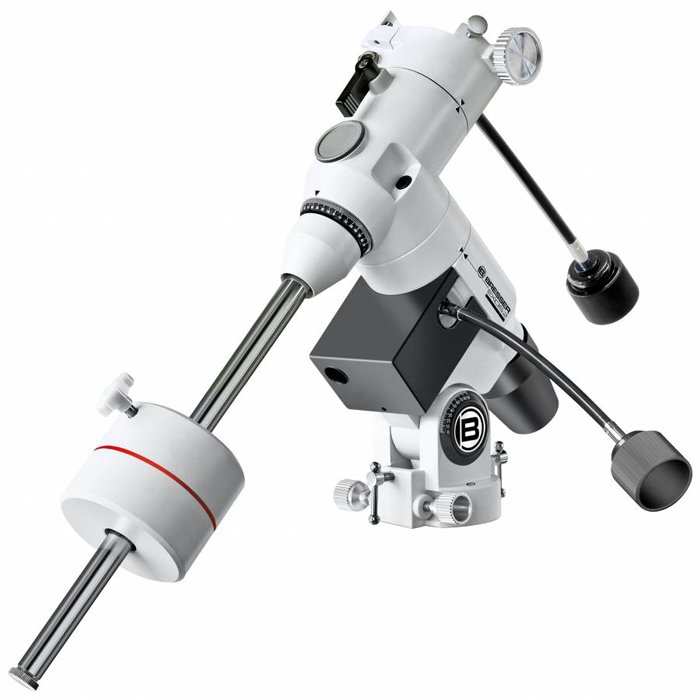
The BRESSER MESSIER EXOS 2/EQ-5 Mount is a robust, equatorial German-style mount specifically engineered for amateur astronomers and astrophotographers seeking stability, smooth tracking, and solid support for mid-sized telescopes. Designed for precision alignment and long-duration celestial tracking, it handles optical tubes up to 13 kg while delivering a rock-solid foundation for both visual observation and entry-level astrophotography. Whether you’re capturing star trails or just enjoying Saturn’s rings through your eyepiece, this mount holds firm, steady, and accurate under the night sky.
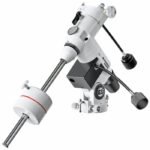
The EXOS 2/EQ-5 mount uses a classic German equatorial configuration, where one axis aligns with the Earth’s rotational axis. This allows it to track celestial objects in a single smooth motion along the Right Ascension axis. Unlike alt-az mounts that move in two directions simultaneously, this setup is far better for accurate long-exposure photography and efficient tracking of stars, planets, and deep-sky objects.
With a weight capacity of up to 13 kg, the EXOS 2 can handle a wide range of telescopes, including long refractors, Newtonian reflectors, and medium-sized catadioptrics. Whether you’re using an 8-inch reflector or a 6-inch refractor with additional accessories like a guide scope or camera, this mount remains steady and vibration-free, essential for crisp images and stable views.
Precision slow-motion knobs are included for both Right Ascension and Declination axes. These allow you to manually adjust the telescope’s aim without disturbing your target. Whether tracking the Moon’s movement across the sky or fine-tuning your alignment to center a faint galaxy, these controls provide smooth, responsive adjustments for a hands-on astronomical experience.
The tripod features thick, stainless steel legs that provide excellent load-bearing capacity and vibration resistance. Its adjustable height makes it suitable for observers of all sizes, and the strong base ensures stability even on slightly uneven surfaces. A central accessory tray further reinforces the tripod and keeps your eyepieces and tools organized and accessible.
Unlike cheaper mounts that use plastic bushings, the EXOS 2 comes equipped with precision ball bearings inside the RA and DEC axes. These bearings ensure smooth gear movement, reduced backlash, and long-term mechanical reliability. Whether you’re observing for five minutes or five hours, the tracking remains consistent and precise throughout your session.
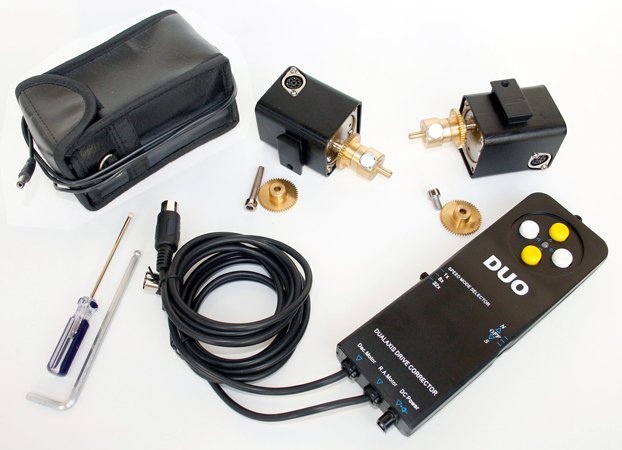
While the base model operates with manual slow-motion controls, it’s fully compatible with GoTo upgrade kits like the BRESSER StarTracker GoTo system. This allows the user to later add automatic object location and motorized tracking with a database of over 100,000 celestial objects. It gives you the flexibility to start simple and scale up as your astronomy skills grow.
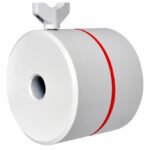
For accurate polar alignment, the mount includes a dedicated holder for a polar scope. While the polar scope itself may be sold separately, this feature ensures you can precisely align the mount with the celestial pole, which is vital for accurate tracking and successful long-exposure photography. It also makes the initial setup faster and more intuitive.
Despite its sturdy construction, the EXOS 2 breaks down into manageable parts—tripod, mount head, counterweights—making it easy to transport to remote dark-sky locations. This portability is crucial for amateur astronomers who frequently travel to star parties or remote observatories and need a reliable yet mobile mount.
1. Level the Tripod on Solid Ground
Open the tripod legs and set it firmly on the ground. Adjust the height and use a bubble level to ensure it’s perfectly flat. A level base is the key to accurate alignment and stable tracking, so take your time on this step.
2. Secure the Mount Head and Counterweight Shaft
Place the mount head on top of the tripod and tighten it using the central bolt. Slide the counterweight bar into place and ensure it’s locked securely. This forms the stable framework for balancing your optical tube later.
3. Mount Your Telescope and Adjust Balance
Attach your telescope tube to the dovetail clamp on the mount. Add counterweights to the shaft and adjust their position until the system is perfectly balanced in both axes. A well-balanced setup reduces strain on gears and ensures smoother movement.
4. Perform Manual or Polar Alignment
Use the included polar scope holder or visual cues to align the mount with the celestial pole. Manual users can align by sighting Polaris (or Sigma Octantis in the southern hemisphere), while those with the optional polar scope get higher accuracy.
5. Begin Tracking with Slow Motion Controls
Once aligned and balanced, use the RA and DEC knobs to move the telescope smoothly across the sky. You can now track stars, planets, and deep-sky objects by gently turning these knobs to follow Earth’s rotation.
1. Store in a Dry and Dust-Free Location
When not in use, disassemble the mount and store it in a padded case or dry cupboard. Avoid places with moisture or excessive dust to protect the mount’s internal components and finish.
2. Avoid Harsh Handling and Rough Terrain
Don’t drag or carry the mount roughly across uneven ground. Always lift with care and avoid impacts. The internal gears and bearing systems are sensitive and can be thrown off alignment if mishandled.
3. Clean Gently and Periodically Inspect
Wipe down the metal parts with a dry microfiber cloth. Avoid water or strong cleaning solutions. Check all bolts and clamps occasionally to make sure they remain secure and rust-free.
4. Grease the Gear System When Needed
If you notice tightness or grinding, apply telescope-safe grease to the RA and DEC gear systems. Avoid over-lubrication, and never use automotive grease as it can harm precision equipment.
5. Protect the Tripod Legs and Screws from Rust
After observing in damp environments, wipe down the tripod and all screws. Moisture can cause rust and degrade threading, especially in coastal or monsoon-prone areas.
Do’s:
Always balance the telescope before each session.
Securely fasten all bolts and locks to avoid shifting.
Use the central accessory tray to keep small parts and eyepieces organized.
Keep the tripod level using a bubble level.
Perform regular visual inspections for wear or misalignment.
Don’ts:
Don’t exceed the weight capacity of 13 kg with extra-heavy scopes or cameras.
Don’t operate on uneven or sloped ground without leveling first.
Don’t force adjustments when axis locks are engaged.
Don’t leave the mount outdoors overnight in damp or humid weather.
Don’t use oil-based lubricants or random greases inside the gear system.
100% Original Product – We only sell genuine BRESSER mounts with verified warranty.
Expert Assistance – Our support team is trained in telescope equipment and ready to guide you.
Fast Shipping & Safe Packaging – Your mount is protected with double-layer shockproof packaging.
Trusted by Hobbyists & Pros – Preferred by astronomers across India for quality service and support.
Hassle-Free Returns – Transparent policies and an easy return process for defective or mismatched items.
| Specification | Details |
|---|---|
| Brand | BRESSER |
| Model | Messier EXOS‑2 / EQ‑5 |
| Mount Type | German equatorial (non-GoTo by default; GoTo optional via kit) |
| Payload Capacity | 13 kg for visual use; ~10 kg for astrophotography |
| Tripod | Stainless steel, adjustable from 69 cm to 109.5 cm |
| Polar Alignment | Illuminated polar finder scope included |
| Counterweight | 4.5 kg weight included |
| Mount Weight | 5.6 kg (without counterweight) |
| Tripod Weight | 4.7–4.9 kg depending on source |
| Total System Weight | Approx. 14.8 kg with counterweight |
| Bearings | Dual ball bearings in both RA/DEC axes |
| Drive System | Optional drive/motors or GoTo via StarTracker kit; belt drive available |
| Tracking Resolution | 0.36′ per microstep stepper motor |
| Autoguider Port | ST-4 compatible for guiding |
| Controller Compatibility | StarTracker handbox (DE/GB/FR/ES/IT); ASCOM/Alpaca driver support |
| Power Requirements | 12 V DC; optional battery pack (8× D cells) |
| Mount Features | Bubble level, graduated circles, tripod accessory tray |
| Warranty | 1 years |


Reviews
There are no reviews yet.